Posts

Showing posts with the label Simply Easy

DIY Summer Decor

Image
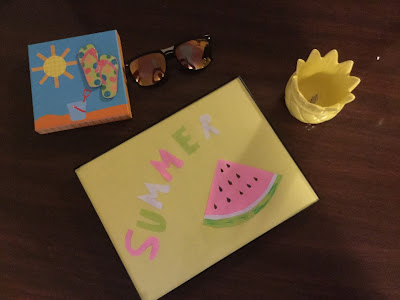
Hey everyone! It's Monday! And for today's post I will be showing you how to make this super cute and simple Summer Framed Decor !! So let's get started!  Step 1: Gather your supplies: A frame (with glass and and a backing), yellow, green, pink and white paper, a black pen, and scissors.   Step 2: So for today, we are going to be making a piece of watermelon to go in the frame. So in the picture above, you can see three shapes for making the watermelon, cut those out with your scissors.  Step 3: Taking your pen, draw some black seeds onto your large pink part of the watermelon slice.   Step 4: Then glue the white and green parts onto the pink.(As shown in the picture above) Let it dry before moving onto the next step.  Step 5: You're going to need your colored paper for this step. Cut out the word "Summer" using your 3 different colors. Then place a piece of yellow paper to be the background. Frame this.     ...

DIY Shushie

Image
Hey everyone! Today is Monday and I will be showing you how to make an awesome summer drink! This is a super simple recipe to make and it tastes great! I have already made this twice this summer. That's how good it is! These drinks are great for hot days when you need to cool down. So lets get started!! Step 1: Gather your supplies: A blender, ice, lemons, a cutting board, a knife, and sugar. Step 2: Squeeze the juice out of two lemons into a small bowl. Then mix in two (or three depending on how sweet you would like your slushie) Tablespoons of sugar into the lemon.  Step 3: Blend your ice in the blender.(I used about 7 or 8 cubes of ice). You might need to add a bit of water to help blend the ice smoothly. After your ice has turned to slush you can add your lemon/sugar mixture in. Mix that up and pour into a glass. And your done!! This makes about one serving of lemon slushie. It is kind of a lot so I would suggest sharing.  I hope you guys...

DIY DONUT CD

Image
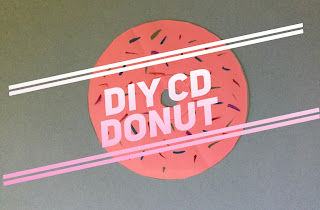
Hey everyone! It's Monday!! And I'm so sorry I haven't posted in 2 weeks but I really needed a break from blogging since I have been so busy with moving. But for today's post I wanted to diy an old clear CD and make it a cut diy donut for decoration! I really like how it turned out and I would definitely make this again. Let me know in the comments if you have any suggestions for any future posts and I'll try to make it happen. So let's get started! Step 1: To start you are going to need to gather your supplies. You will need, a clear CD, a sheet of colored paper (your choice,I went with pink), markers,scissors, and glue. Step 2: Start by tracing the size of your CD onto your paper. Then using your scissors cut out your perfect circle with a small whole in the middle. Step 3: Using your markers make sprinkles on your circle. Make sure to not make to many or it will cover up your whole donut. Step 4: You are going to need a tissue for th...

Travel Tips

Image
Hey everyone! It's Monday and it is almost summer. And a lot of people are getting ready to travel for the summer and so am I. So I thought that I would share some EASY traveling tips with you so that you're prepared for any trip you take. All of these tips are super helpful and I use almost all of them! If you like posts like this please let me know in the comments so I can make more posts like this. So lets get started! Tip 1: When packing a suitcase most people just fold their clothes and throw them in. But a better way is to roll your clothes and put them in. This will leave you with more space and less wrinkles in your clothes.  Tip 2: Another tip to saving space in your suitcase(or backpack) is to pack all of your pairs of socks in your shoes. So you can fit about 3 pairs in a large shoe, so that is 6 pairs of socks in a pair of shoes! That is a crazy amount of space you'll be saving! Tip 3: When packing shampoo,conditioner or lotion, sometime...

DIY Mothers Day Card

Image
Hey everyone! Today is a bonus post because I wanted to get this up before Monday. Since Mothers Day is on Sunday I thought that I would post a DIY so that you can make it in time for Sunday. But I still will be posting on Monday so look out for that too! :) I also made a Mothers Day DIY last year which I will leave the link to at the end of this post. So lets get started! Step 1: Gather your supplies: 3 different colors of paper, a colorful design (or use the front of an old card like I did), glue, and scissors. Step 2: Fold your first piece of paper in half. DO NOT CUT IT. Step 3: Cut out two triangles with your scissors. Make sure to use two different colors of paper. Step 4: Glue your two pieces of paper on your first paper. (See in picture) Step 5: Glue your top piece on top. Then let it dry. Now you can write inside a note to your mom! <3 And that is the DIY!! <3 I hope you try it out! And if you make this let me know in the comments b...

DIY Donut Earphone Holder

Image
To start off this post I would just like to say....THIS IS MY 100th POST!! I am so happy and excited to be able to make my 100th post. Last week I forgot that my 100th post was coming up. I wanted to do something special for this post and make it super exciting. But then I decided I would go back to when I started this blog. So I went back to my roots and made a craft. But this time I didn't make this craft by myself! Two of my friends came over and helped me out. Thanks to Emma and Emmy for helping me out with my 100th post on DIY Crafts + Life Style you have made this day really special! :) This DIY is cute and helps you organize your earphones. Earphones always get tangled and I can never find then so this DIY helps with both of those things. Let me know in the comments if your gonna try this out!! <3 Lets get started! Step 1: Gather your supplies: A piece of cardboard, paint, a paint brush, and a X-acto knife.(you will also need two different sized container tops...

DIY Organizer

Image
Hey guys! It's Monday! And for today's post I am showing you guys how to make a easy DIY organizer. In the last post I talked about Organization so I thought for today I would show you an organization DIY. I know I haven't done a craft on here in forever so here it is!  So without further adieu...Let's get started! Step 1: Gather your supplies: 1 piece of cardboard (the size depends on how large you want your box), a craft knife,a ruler, a paintbrush, paint(of your choice), and a stapler. Step 2: Take your cardboard,knife, and ruler. ( It is hard to explain exactly how to make all the right sizes so look at the picture to see how I did it)  Step 3: Take your piece at the ends and fold them upward and staple them together.  (If you have any questions about this please feel free to ask in the comments below, and I will be sure to answer them) Step 4: After you have stapled your box you can apply paint to your box. Let dry completely ...