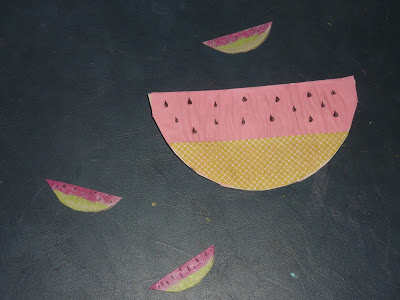
Watermelon Magnets
Hey guys! Today's Monday, and I am going to show you how to make these super cute DIY watermelon magnets! I love them so much! So without further adieu let's get started!
So first we are going to start with the large watermelon magnet, then next I will show you how to make the small watermelon magnets.
Gather your supplies:
White thin card-stock, magnet strips, pink paper, green paper, a pen, scissors, and glue.
Step 2:
Cut a half of a circle out of your card-stock, then your pink paper. Then cut a half of an smaller oval out of the green.
Step 3:
Glue your green to the bottom of your pink. Then take your black pen and draw little black seeds on the pink part, as shown in the picture. Now glue your watermelon to your card-stock piece.
Step 4:
Glue your magnet to the back of you watermelon. I used regular glue but you may use a stronger glue if you want it to last longer.
Step 5:
Let your glue dry completely before using your magnet. And your done!
Now here is how to make the mini watermelon magnets:
Step 1:
Gather your supplies:
White thin card-stock, green and pink paint, glue, scissors, and magnet strips.
Step 2:
Cut out half ovals out of your card-stock. Then take your green paint and start by painting the bottom. Take your pink and paint the top.
Step 3:
Let your paint dry completely. Then take your black pen, and draw little seeds on the pink part. Glue your magnets to the backs of your watermelons.
Step 4:
Let your glue dry completely. And your done! Now you can hang up all your watermelon magnets on your refrigerator or anything medal!
And that is how you make them! Let me know if you try out this craft, in the comments! I absolutely loved making this for you guys and I hope you will love it too! Have a great day and I'll see you on Monday! -BloggerGirl


Comments
Post a Comment